Building my first Split Keyboard
Getting Started
I have always spent a lot of time at the computer, and eventually I started paying more attention to the keyboards I use. After switching from a generic model to a Keychron mechanical keyboard, I quickly became interested in modding and exploring the potential of a keyboard. This eventually led me to the idea of building my first keyboard.
As I explored, I became increasingly interested in ergonomic designs, layouts that reduce strain and allow more natural hand positioning. This naturally led me to split keyboards.
My requirements:
- Wireless for flexible positioning
- Low profile switches for a light, flying feel
- Open source firmware and community support
I wanted a keyboard that was accessible, fully configurable, and ergonomic. Considering all these factors, I decided to go with the Totem keyboard. It offered a customizable firmware, a split layout, and community support, along with plenty of build guides, making it the ideal choice for a first-time build.
Parts and Preparation
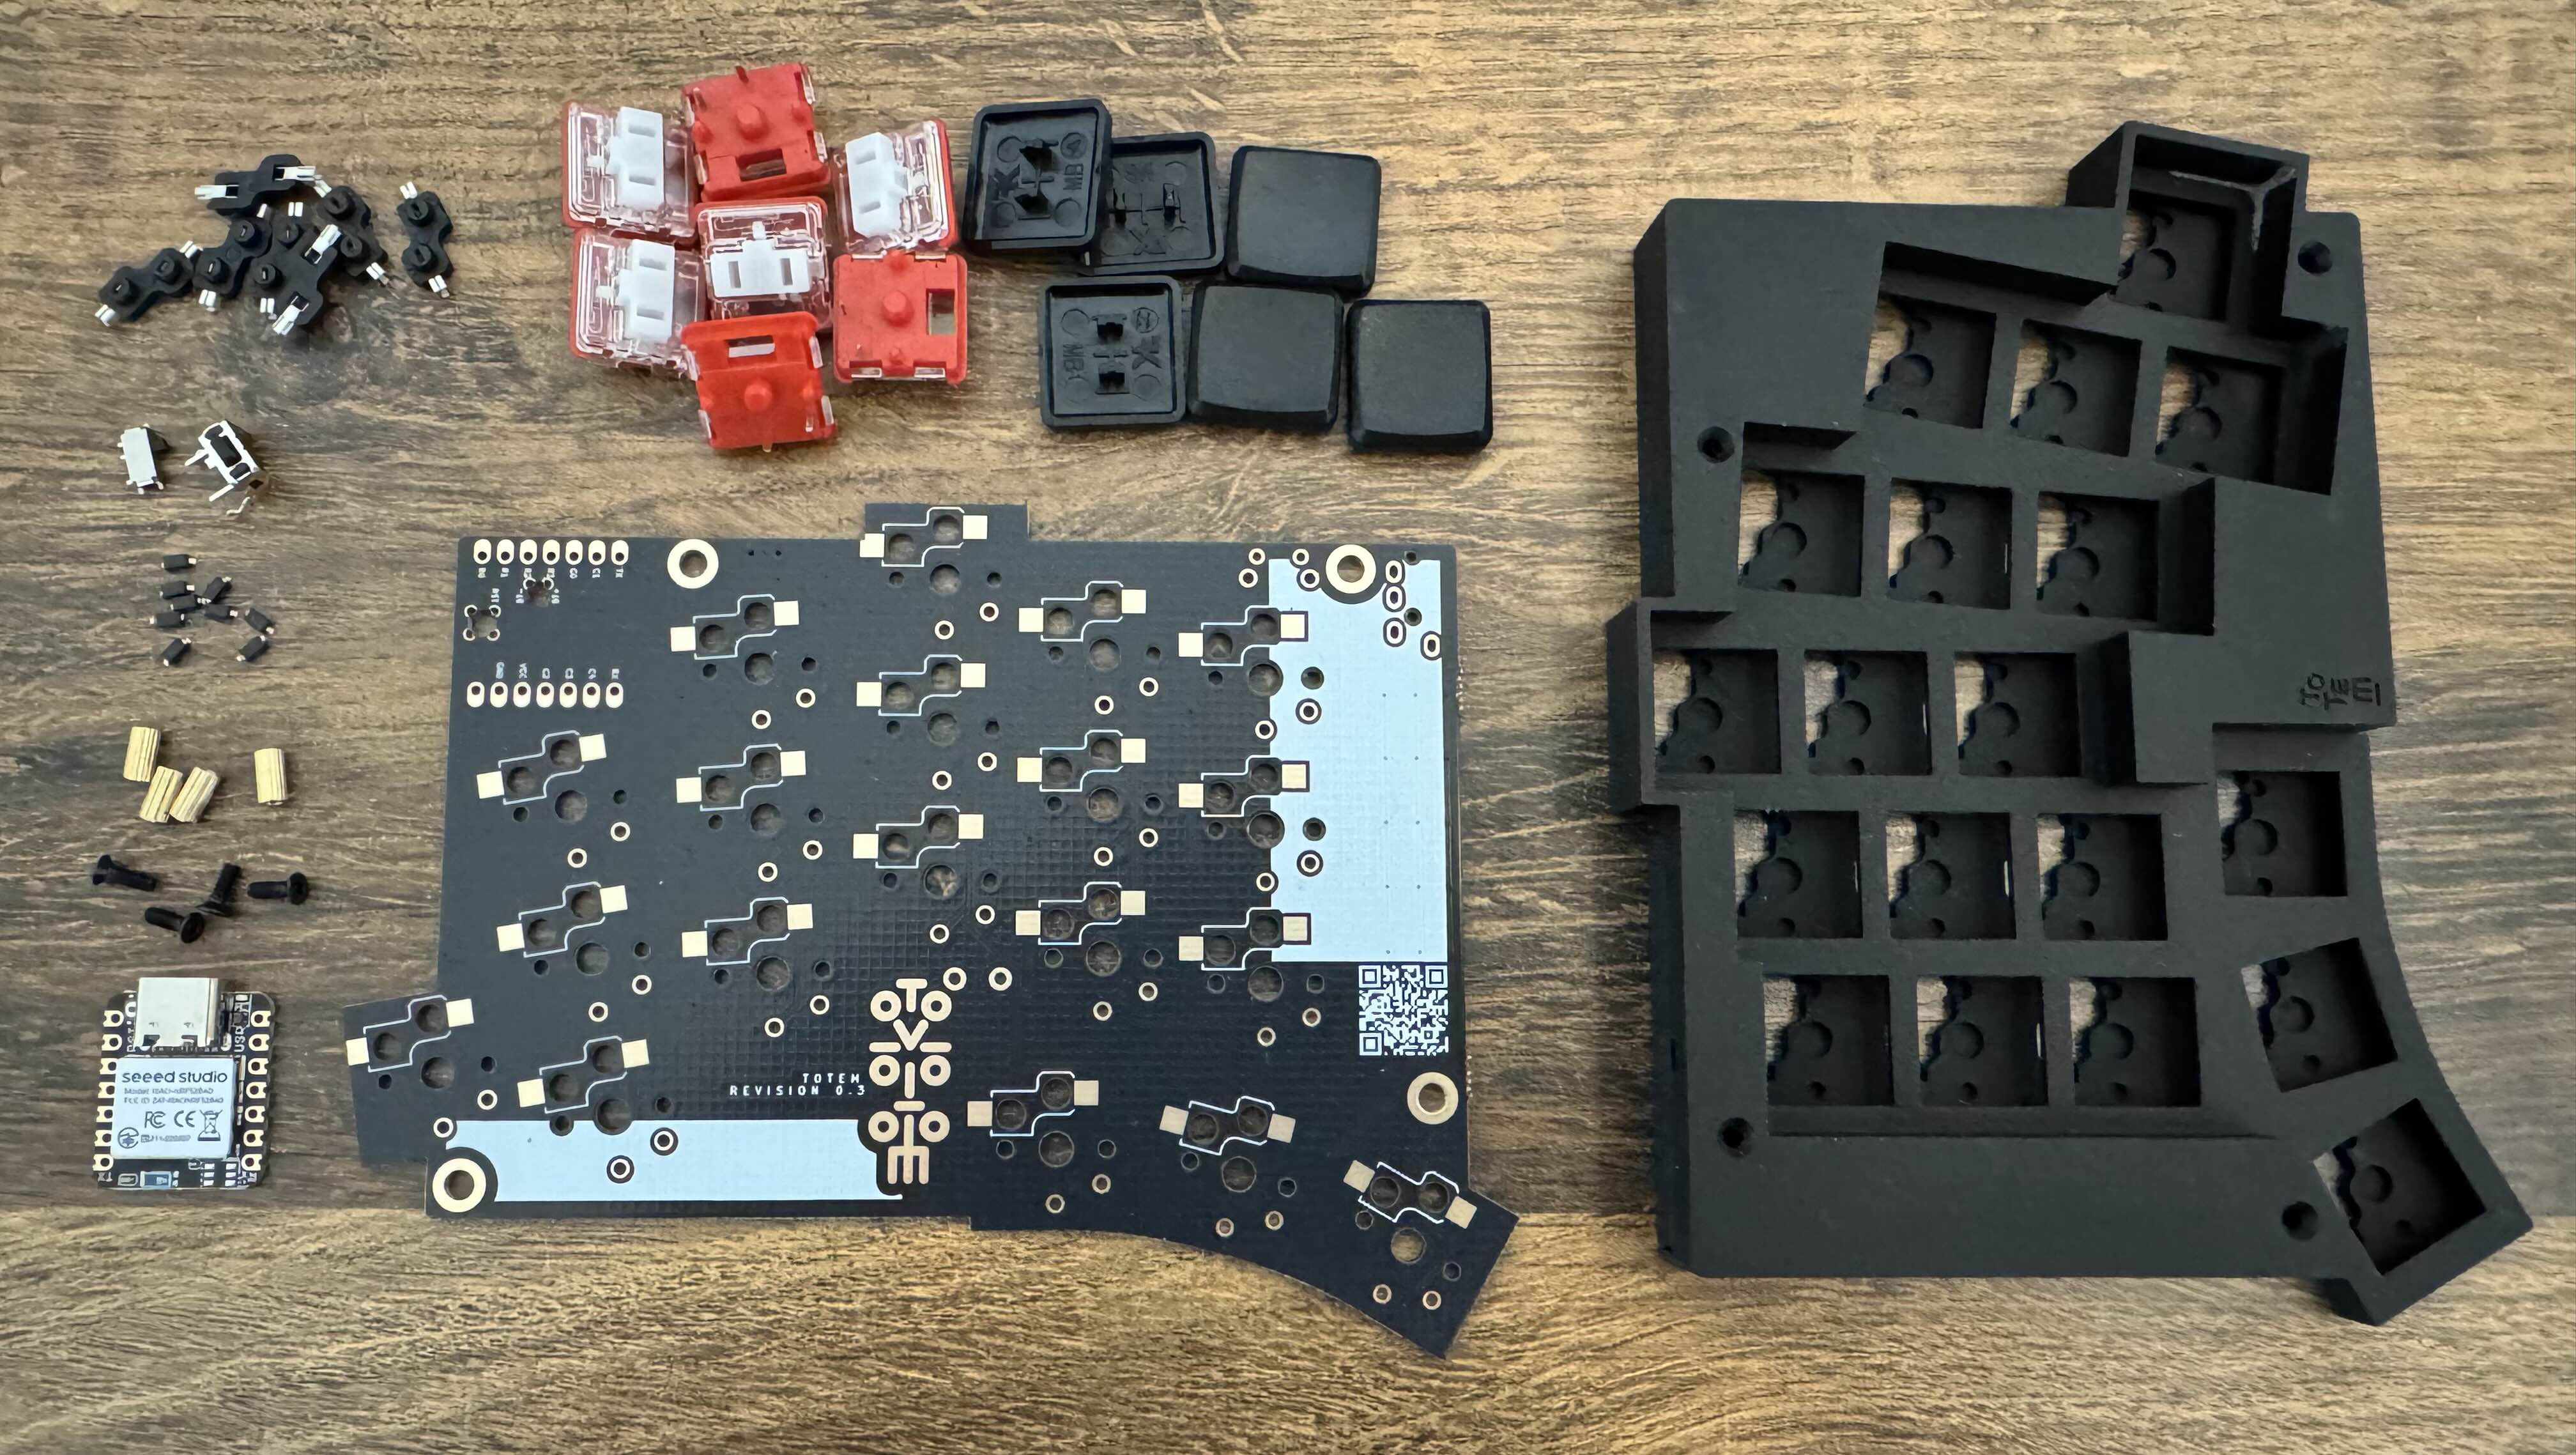
For the build I gathered PCBs and 3D-printed cases from JLCPCB, switches and keycaps from Keebart, and switch sockets, diodes, and other small components from AliExpress, with the microcontroller from Seeed Studio.
While waiting for the parts, I practiced with a small soldering kit from Amazon. This helped a lot once the keyboard components arrived, especially since the diodes turned out to be extremely small.
Building the Keyboard
Build guides were very helpful, especially for understanding how tightly the parts fit inside the case. Soldering the microcontroller and diodes was quite challenging, while the switch sockets were easy to handle. I had no problems with the power and reset switches. One thing I realized quickly is that having additional flux, rather than relying only on the flux in the solder, would have made the joints much cleaner.
I started with the left half of the keyboard. Everything worked except for the middle column. Using a multimeter, I quickly spotted the issue, which turned out to be a poor solder joint on the microcontroller. Despite this small setback, the rest of the assembly was manageable, and soldering itself turned out to be fun and surprisingly relaxing.
Typing Experience
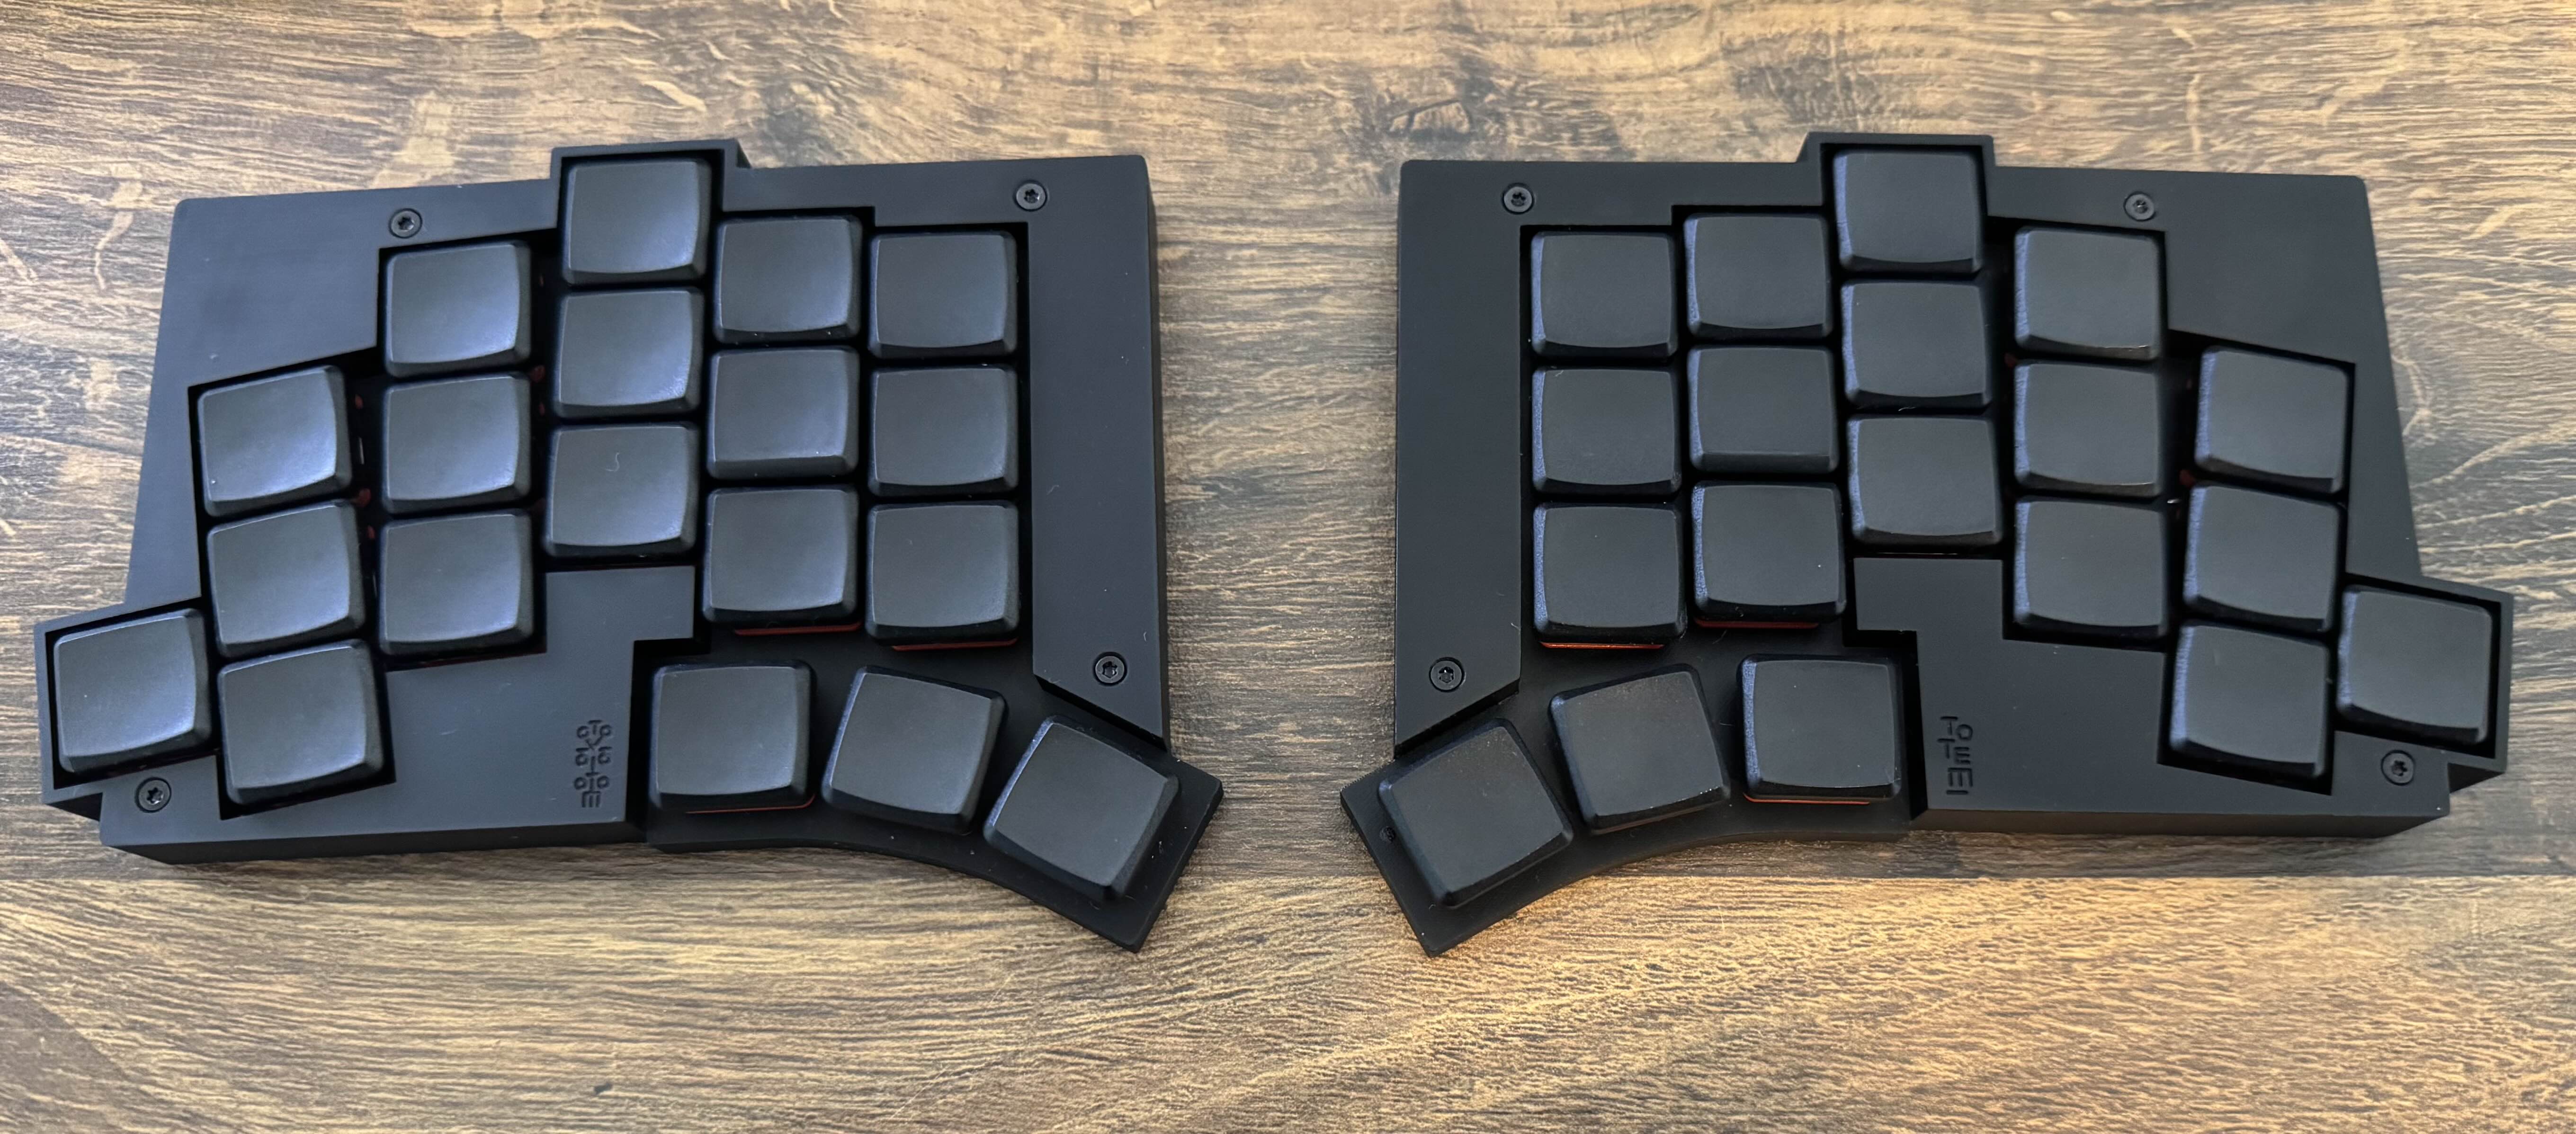
This is my first column-staggered keyboard, but it was not difficult to get used to. The angled column for the pinky was the most challenging at first.
The split layout is comfortable not only for the hands but also for the arms and shoulders. Typing feels much more natural, especially in a standing position. It is also comfortable when lying down, with the keyboard halves resting at the sides of your legs, which feels much smoother than having a keyboard on your lap.
I especially love the thumb keys. I am also using home row mods, and the shift key feels amazing. Some combinations in my window manager can feel awkward. For example, when moving a window to a different workspace I press Super, then Shift, then a layer key to access the numbers, and finally the number key itself. This is just one extra key compared to my previous layout without layers, but it already feels like a lot. I will either adjust the combos or get used to it over time.
Overall, I really enjoy typing on the Totem. The entire building process, from soldering to testing, was satisfying and enjoyable.